You walk out of your appointment excited, glance in the mirror, and think, “Wait, are my lips supposed to look like this?” That moment of panic is common. Lip filler recovery has a pattern, but it rarely looks perfect right away.
In the first few days, swelling can make your lips look larger than planned, and bruising can show up in places you didn’t expect. Then the filler starts to settle, hydration improves, and the shape looks more like the “you, but refreshed” result you had in mind.
Below is a realistic, day-by-day guide to swelling, bruising, and when lip filler typically looks finished, plus simple aftercare tips that actually help.
What’s normal after lip filler (and why the first look can surprise you)
Most lip fillers used today are hyaluronic acid (HA) gels. HA naturally binds to water, which is great for a soft, hydrated finish, but it also means the early days can look puffy. Add needle entry points, tissue irritation, and your body’s normal inflammatory response, and you get swelling and sometimes bruising.
A few details that help set expectations:
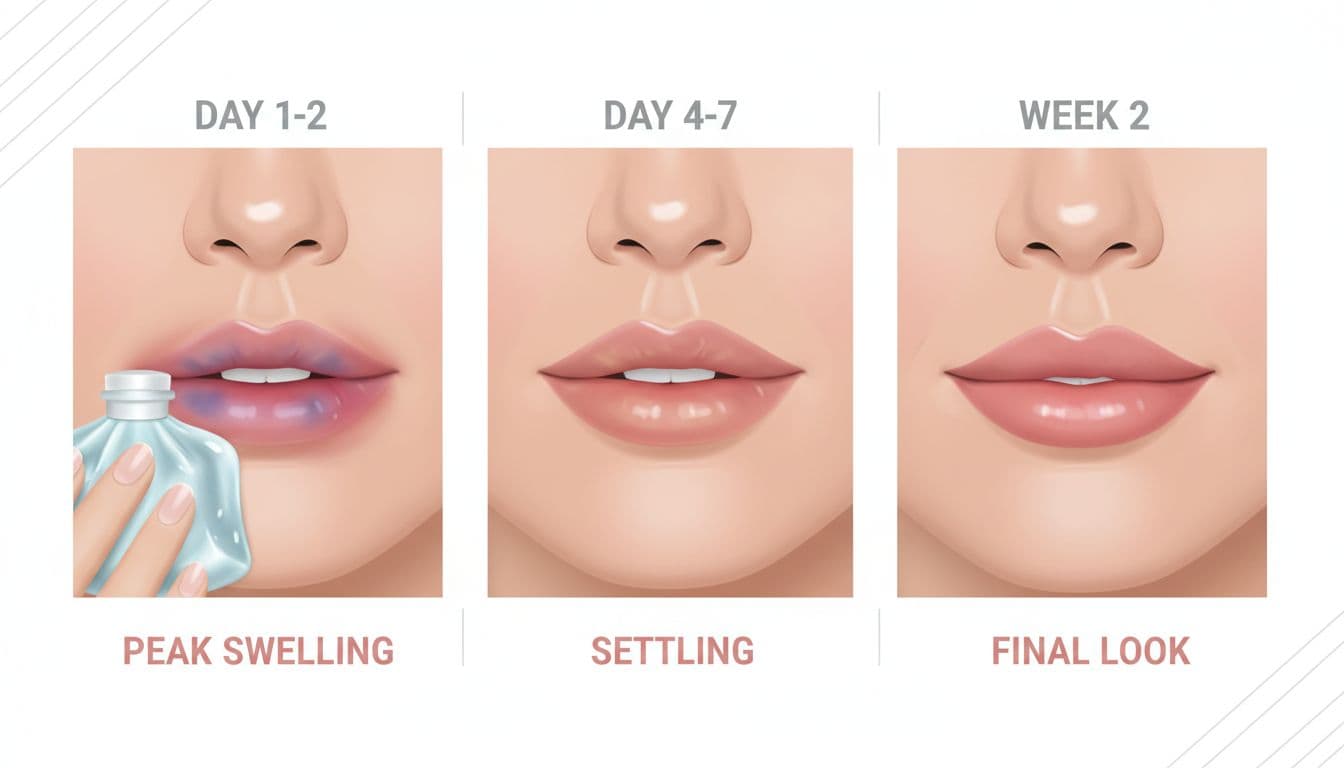
- Swelling is usually front-loaded. It tends to peak in the first 24 to 48 hours, then drops steadily.
- Asymmetry is common early on. One side might swell more, or the top lip might look larger than the bottom for a few days.
- Small lumps can be normal at first. Mild firmness, tiny bumps, or a slightly “ropey” feel often improves as swelling goes down and the product integrates.
- “Done” is not the same as “immediate.” The filler looks present right away, but the final shape typically takes time.
If you’re deciding between lip filler and other injectable options, the Injectables page is a helpful overview of what different treatments are designed to do, including restoring volume while keeping a natural look.
Lip filler recovery timeline, day by day (swelling, bruising, texture)
Every body heals differently, but most people follow a similar arc. Here’s a practical snapshot, followed by details you can actually use.
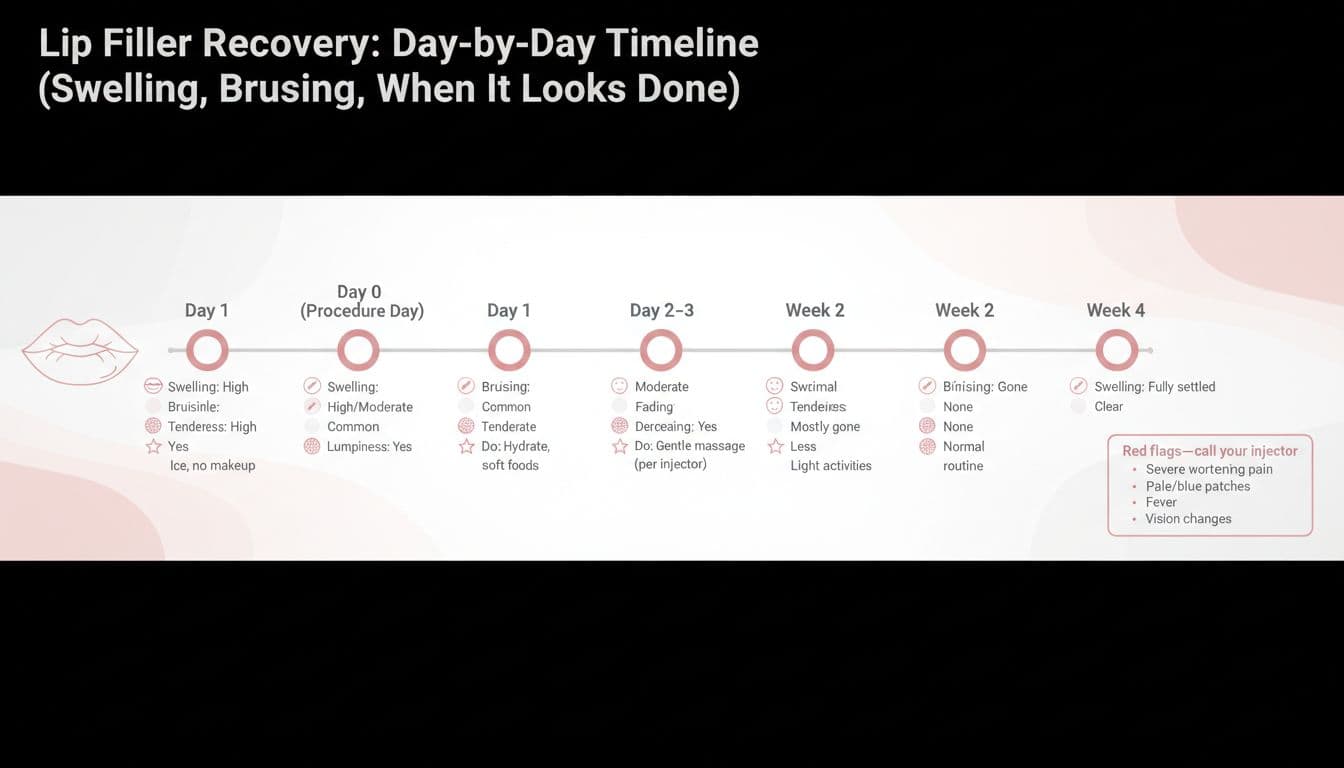
| Timeframe | What you may see | What it often feels like |
|---|---|---|
| Day 0 (treatment day) | Immediate fullness, mild swelling | Tender, tight, warm |
| Day 1 | Swelling builds | More tender, “heavy” lips |
| Day 2 to 3 | Peak swelling, possible bruising | Sore, firm spots possible |
| Day 4 to 7 | Swelling drops, bruises fade | Less sore, texture smoothing |
| Week 2 | Shape settles | Softer, more natural |
| Week 4 | Fully stabilized | Final look for most people |
Day 0: Right after your appointment
Your lips may look perfectly plump, or oddly overfilled. Both can happen. Expect mild swelling and tenderness, plus small red dots at injection sites. If you’re prone to bruising, you might see the start of it near the lip border.
Day 1: Swelling ramps up
This is often the “what did I do?” day. Swelling can be noticeably worse in the morning. The lip edges can look less defined, and the cupid’s bow may look blurred. This is normal early healing, not a sign the filler is “wrong.”
Day 2 to 3: Peak swelling and bruising window
Many people hit their maximum swelling here. Bruising can look darker before it looks better, like a fading sunset that gets more dramatic before it clears. You might also feel small firm areas, especially where product was placed for structure.
Day 4 to 7: The settling phase begins
This is the week where you start to recognize your face again. Swelling drops, definition comes back, and the lips usually feel less tight. If you had bruising, it often shifts from purple to yellow-green as it fades.
Week 2: When it usually looks “done”
For most people, Week 2 is the first real final preview. The lips feel softer, shape looks balanced, and any leftover tenderness is minimal. If you still feel small bumps, they often improve with time, but you should follow your injector’s guidance on massage (some lip areas should not be massaged).
Week 4: Fully stabilized results
By four weeks, the filler has typically integrated as much as it’s going to. This is a good time to judge whether you want more volume, more definition, or a small tweak. It’s also the best point for “after” photos because early swelling no longer skews what you see.
Aftercare that helps (and red flags you shouldn’t ignore)
Good aftercare is less about doing a thousand things and more about avoiding the few that make swelling worse.
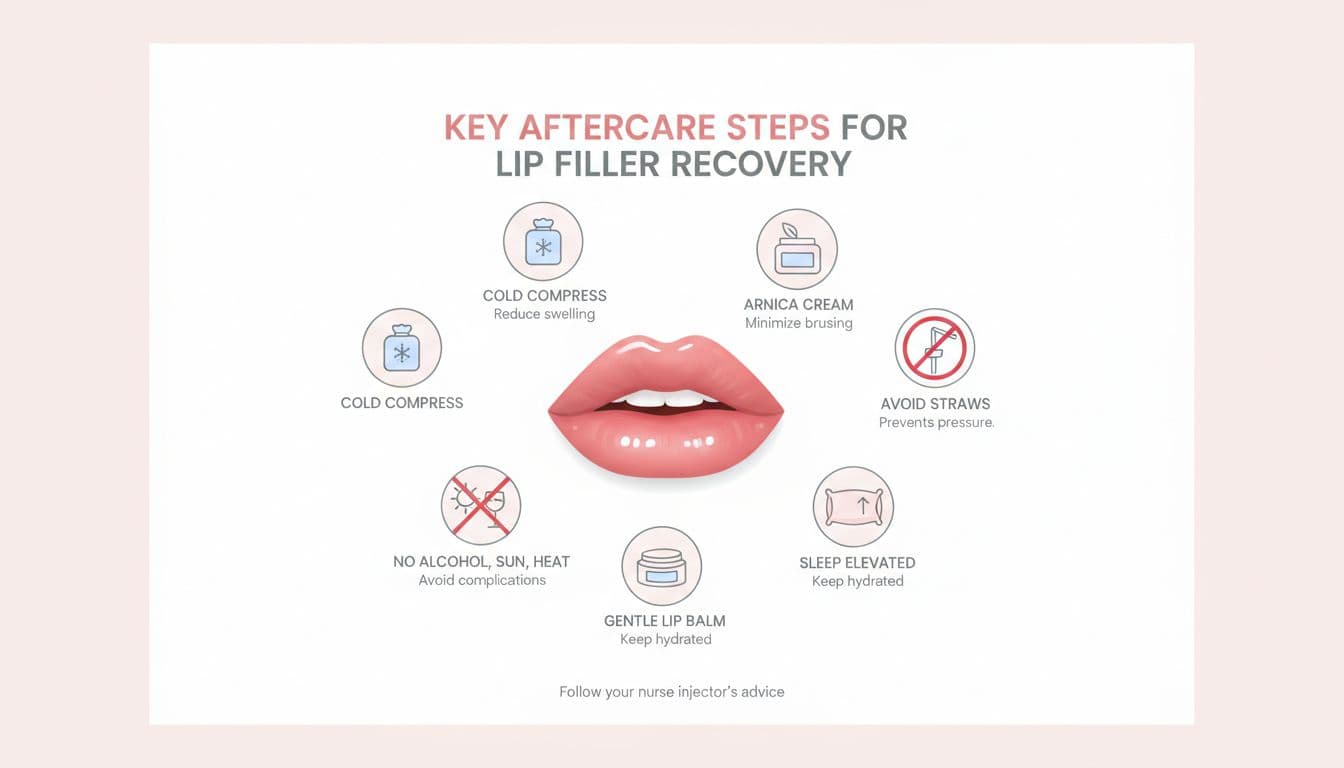
Simple aftercare for the first 48 hours
- Use cool compresses in short sessions if your provider okays it, think gentle cooling, not aggressive icing.
- Skip hard workouts, hot yoga, saunas, and steam. Heat and elevated heart rate can worsen swelling.
- Avoid alcohol for at least the first day if you bruise easily, it can make bruising more likely.
- Don’t pick at dry skin around the lips. Use a bland, gentle balm and let flaking resolve on its own.
- Try not to use straws and avoid intense lip movements (like wide stretching) the first couple of days.
If you’re planning other skin-refresh treatments, it’s smart to space them out. Options like microneedling can pair well with a rejuvenation plan, but timing matters, your provider can guide you based on your skin and what was done to the lips.
Red flags: when to call your injector right away
Mild swelling and bruising are expected. These are not. Contact your injector urgently if you notice:
- Severe, worsening pain that doesn’t match normal tenderness
- Pale, white, gray, or blue patches on the lips or nearby skin
- Blistering or skin breakdown
- Fever or spreading redness
- Vision changes (treat as an emergency)
Trust your instincts. If something feels off, it’s always better to check.
Conclusion
Lip filler can feel like an emotional roller coaster for a few days, mostly because swelling hides the real result. In most cases, bruising and puffiness calm down within a week, and the lips look much closer to “done” around Week 2, with full settling by Week 4. If you want a personalized plan and clear aftercare instructions from experienced nurse injectors, schedule a consult through the contact page and get answers that fit your goals and your anatomy.